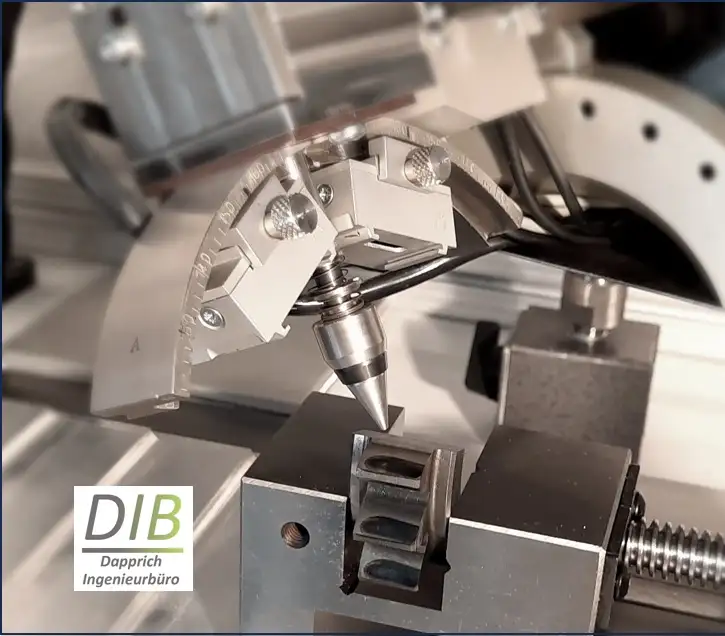
Fig. 1. X-ray diffractometer
Author: D. Dapprich
Editing: B. Černe
Reading time: 7 min

Fig. 1. X-ray diffractometer
During the manufacture and processing of a component, the residual stresses arise and change to a considerable extent. Mechanical processing (grinding, turning, milling, shot peening, drawing, rolling, forging, ...), thermal (structural transformation, annealing processes) and chemical processes (coating, oxidation, corrosion, ...) as well as combined processes (nitriding, nitrocarburizing) lead to changes in the residual stress state.

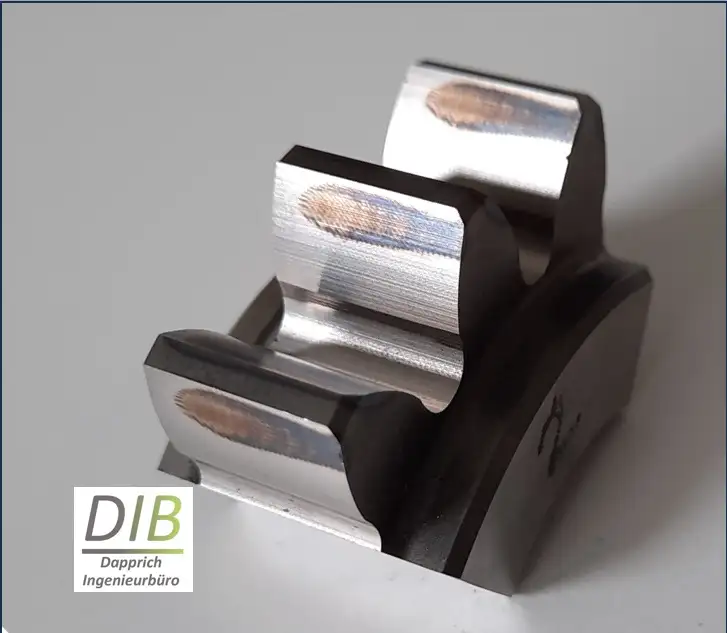
Fig. 2. Gear segment with grinding burns
Residual stresses can reach values in the order of magnitude of the yield or elongation limit of the current material condition. External loads acting on the component during operation add to the existing residual stresses - in unfavorable cases, exceeding the local strength can lead to cracks or complete failure of the component.
The following 3 cases of residual stresses can be distinguished:
1. tensile stress
2. compressive stress
3. shear stress
The service life of a component that is subjected to alternating stress under operating load depends, among other things, on its residual stress state. A viable solution for increasing the load-bearing capacity of the component or its design service life can be the targeted incorporation of residual compressive stresses in the functionally relevant contact surface zone. This requires a controlled approach to heat treatment and material processing with knowledge of the level, direction and distribution of the residual stresses generated in the edge zone. On the other hand, residual tensile stresses should always be avoided as they promote the formation of cracks and reduce the service life and load-bearing capacity of the component.
X-ray residual stress analysis in accordance with DIN EN 15305 is a precise and proven method for determining residual stresses. X-ray diffractometers are used for this purpose, which make it possible to determine the crystal lattice spacing using X-rays with a defined wavelength and with the help of Bragg's law:
\begin{multline} \shoveleft \lambda = 2d \cdot \sin \theta, \end{multline}
where \(\lambda\) is the wavelength of the X-rays, \(d\) is the lattice plane and \(\theta\) is the measured diffraction angleAs a rule, the sin²psi method is used for this purpose, in which the direction-dependent grating strain is determined at different angles between the surface normal and the normal of the diffraction grating plane.
In addition to the value of the residual stress, the X-ray measurement also provides the value of the half-width. The half-width is a sensitive indicator of the previous thermal load on the component, e.g., from a grinding process.
By measuring and recording the residual stress and the half-width as a curve over the process-sensitive thickness of the edge zone, a characteristic fingerprint can be created that is highly informative about the quality of the hard fine machining.

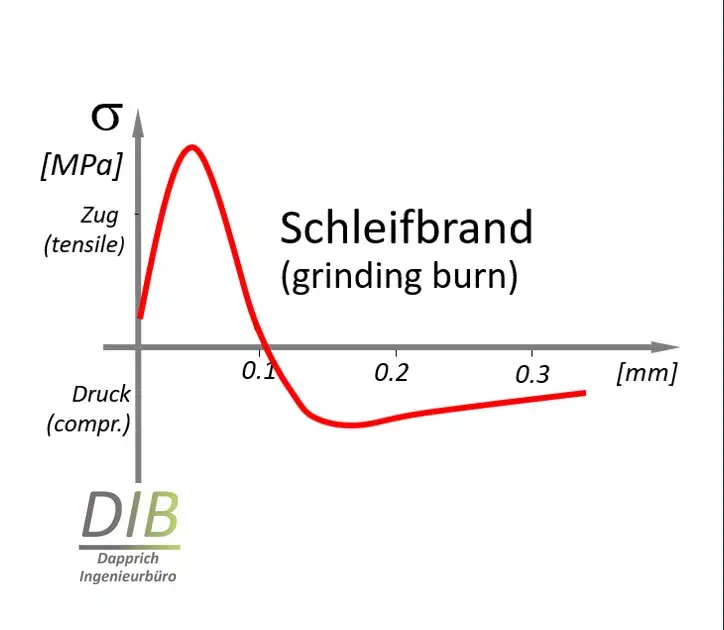
Fig. 3. Residual stress at and below the material surface due to grinding burns
Measurement of residual stress on the component surface according to the d-sin²psi method in accordance with EN15305:2009 using an X-ray diffractometer with Cr-K radiation in the agreed measurement directions parallel to the component surface. Creation of depth profiles by additional preparation of the measuring point using an electrolytic polishing process to generate a largely residual stress-neutral removal on the workpiece surface. The residual stress is then determined again at the same point.
The material removal achieved in each step is determined on a depth gage and assigned to the respective residual stress measured value. The residual stress depth profile is displayed graphically as a plot of the residual stress values over the depth steps.
The X-ray half-width is also determined for each individual residual stress measurement and displayed accordingly. The values are listed in tabular form in the written results report.
Dapprich Ingenieurbüro works in cooperation with RD Motion to provide a complete service package around the measurement of residual stresses by X-ray diffraction. The bureau has broad expertise in the field of non-destructive X-ray diffraction testing, who will be able to advise you on which materials are suitable and support you in the selection and determination of reasonable measuring positions on your component and how you can specifically change the residual stresses and their relevance for your component. Preorder the testing service (id: 08-009) or contact us directly to get more info and reserve a slot for performing your required X-ray diffraction tests.