In exact terms, metrology is the scientific study of measurement, or as the NIST, i.e., the US
National Institute of Standards and Technology and ISO, the International Organization for
Standardization, define it, it is “the science of measurement and its application”.
Measurement is essentially the process of experimentally obtaining one or more quantity values that
can reasonably be attributed to a measured quantity.
In all actuality, metrology is the bedrock of reliability and quality in every industry, ensuring
that products meet exacting standards, thereby inspiring confidence in consumers and driving
technological advancement. In a world of perpetual innovation, metrology empowers us to push the
boundaries of what's possible, enabling us to measure, improve, and refine our designs with meticulous
accuracy, and produce products with ever higher quality.
All well and good, but how can we actually apply and integrate the principles of metrology into our
daily business to improve and retain high reliability of our products and services?
This series of articles aims to provide an overview of the standards, institutions, rules, and
terminology comprising the entire metrological scientific framework, with specific aspects of
metrology subsequently being covered more in detail.
Let's start with the basics.
The SI measurement system
A unified system of measurements has been a hidden driver of development that, since 1875, when the
Metre Convention took place, enabled faster and more precise cooperation and communications across
scientific and industrial domains and across nations and continents. The convention laid the
groundworks for defining the CGS (centimeter–gram–second) system of units, followed by the MKS (meter,
kilogram, and second), the “Practical system of units” and, after several additional iterations and
further studies, the SI system, which is to date the most widely adopted system of measurement.
Need SI-traceable measurements for your materials?
Our ISO 9001 certified lab provides accurate, standardized testing with full traceability documentation.
Explore Testing Lab
Get a Quote
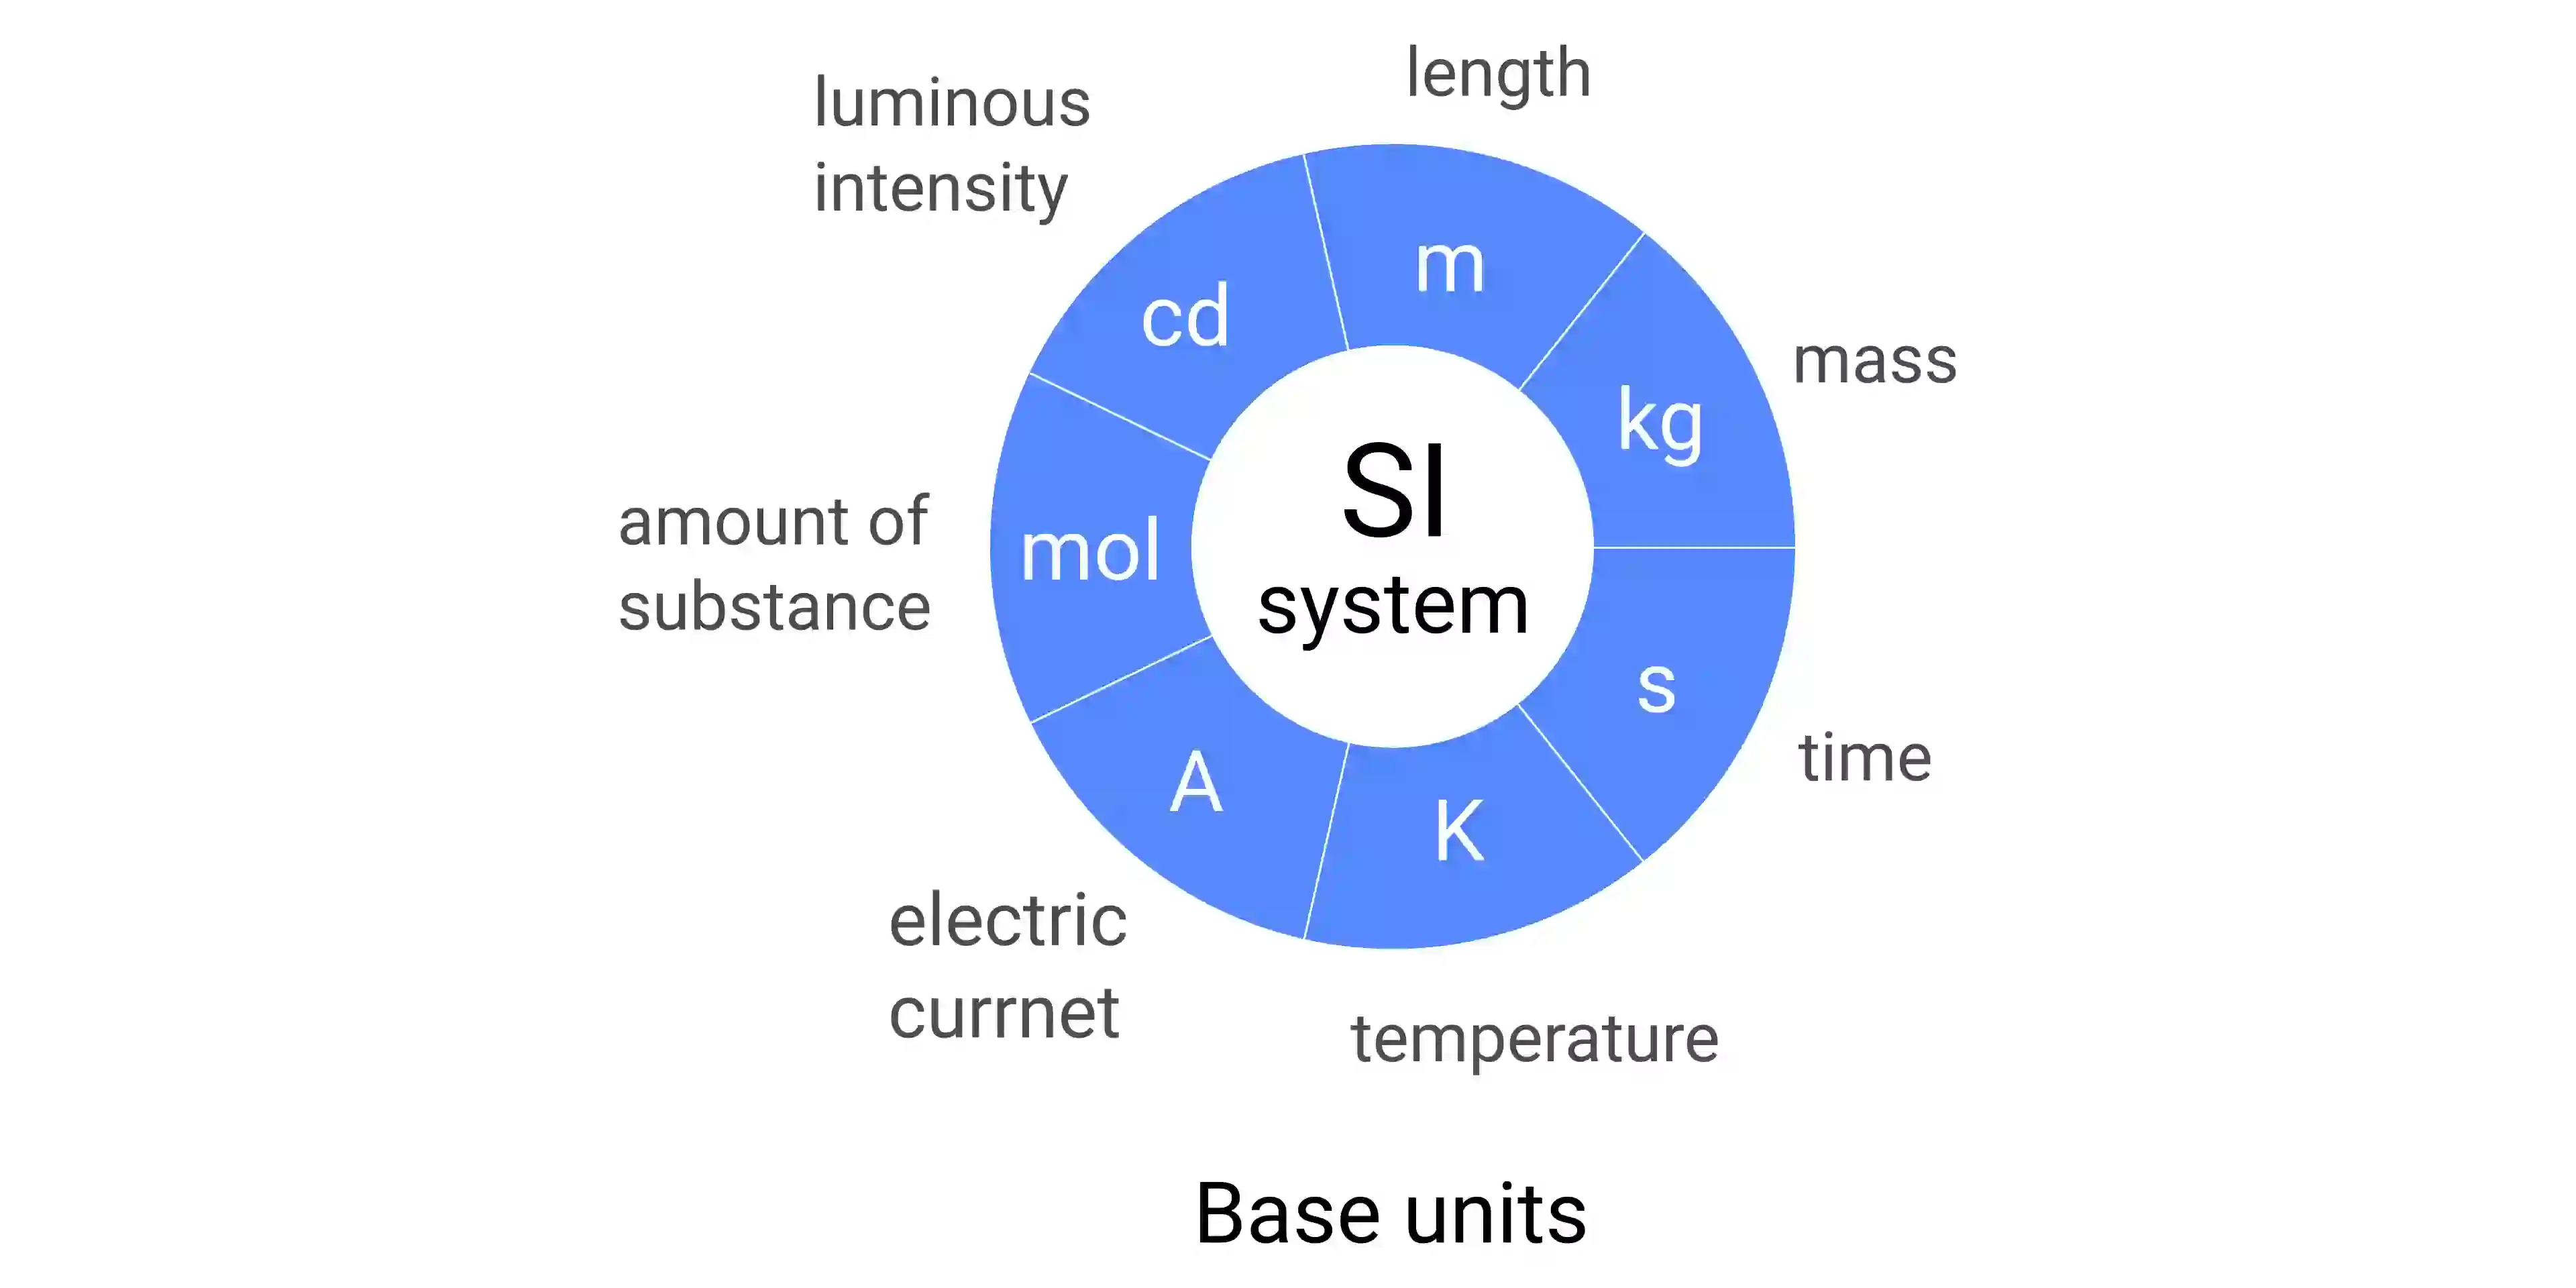
The SI system defines the seven base units and decimal-based multipliers (SI prefixes) on top of
which a multitude of derived units is formed, and seven base constants, which hold exact numerical
values and units. Together these form the basis for performing measurements in all known domains of
physics.

| Defining constant |
Numerical value |
Unit |
| ΔνCs |
9 192 631 770 |
Hz |
| c |
299 792 458 |
m s–1 |
| h |
6.626 070 15 x 10–34 |
J s |
| e |
1.602 176 634 x 10–19 |
C |
| k |
1.380 649 x 10–23 |
J K–1 |
| NA |
6.022 140 76 x 1023 |
mol–1 |
| Kcd |
683 |
lm W–1 |
| Name |
Symbol |
Multiplying factor |
|
quetta
|
Q
|
1030 |
|
ronna
|
R
|
1027 |
|
yotta
|
Y
|
1024 |
|
zetta
|
Z
|
1021 |
|
exa
|
E
|
1018 |
|
peta
|
P
|
1015 |
|
tera
|
T
|
1012 |
|
giga
|
G
|
109 |
|
mega
|
M
|
106 |
|
kilo
|
k
|
103 |
|
hecto
|
h
|
102 |
|
deca
|
da
|
101 |
|
deci
|
d
|
10–1 |
|
centi
|
c
|
10–2 |
|
milli
|
m
|
10–3 |
|
micro
|
µ
|
10–6 |
|
nano
|
n
|
10–9 |
|
pico
|
p
|
10–12 |
|
femto
|
f
|
10–15 |
|
atto
|
a
|
10–18 |
|
zepto
|
z
|
10–21 |
|
yocto
|
y
|
10–24 |
|
ronto
|
r
|
10–27 |
|
quecto
|
q
|
10–30 |
The organization directly responsible for regulating and continually developing the SI system is the
International Bureau of Weights and Measures (BIPM), which in turn supervised and presided over by the
CIPM and CGPM in accordance with the CCU. The entire organizational structure is fairly complex but
one of their main purposes is to establish a uniform and consistent global measurement system, with a
foundation linked to the International System of Units (SI).
Traceability and calibration
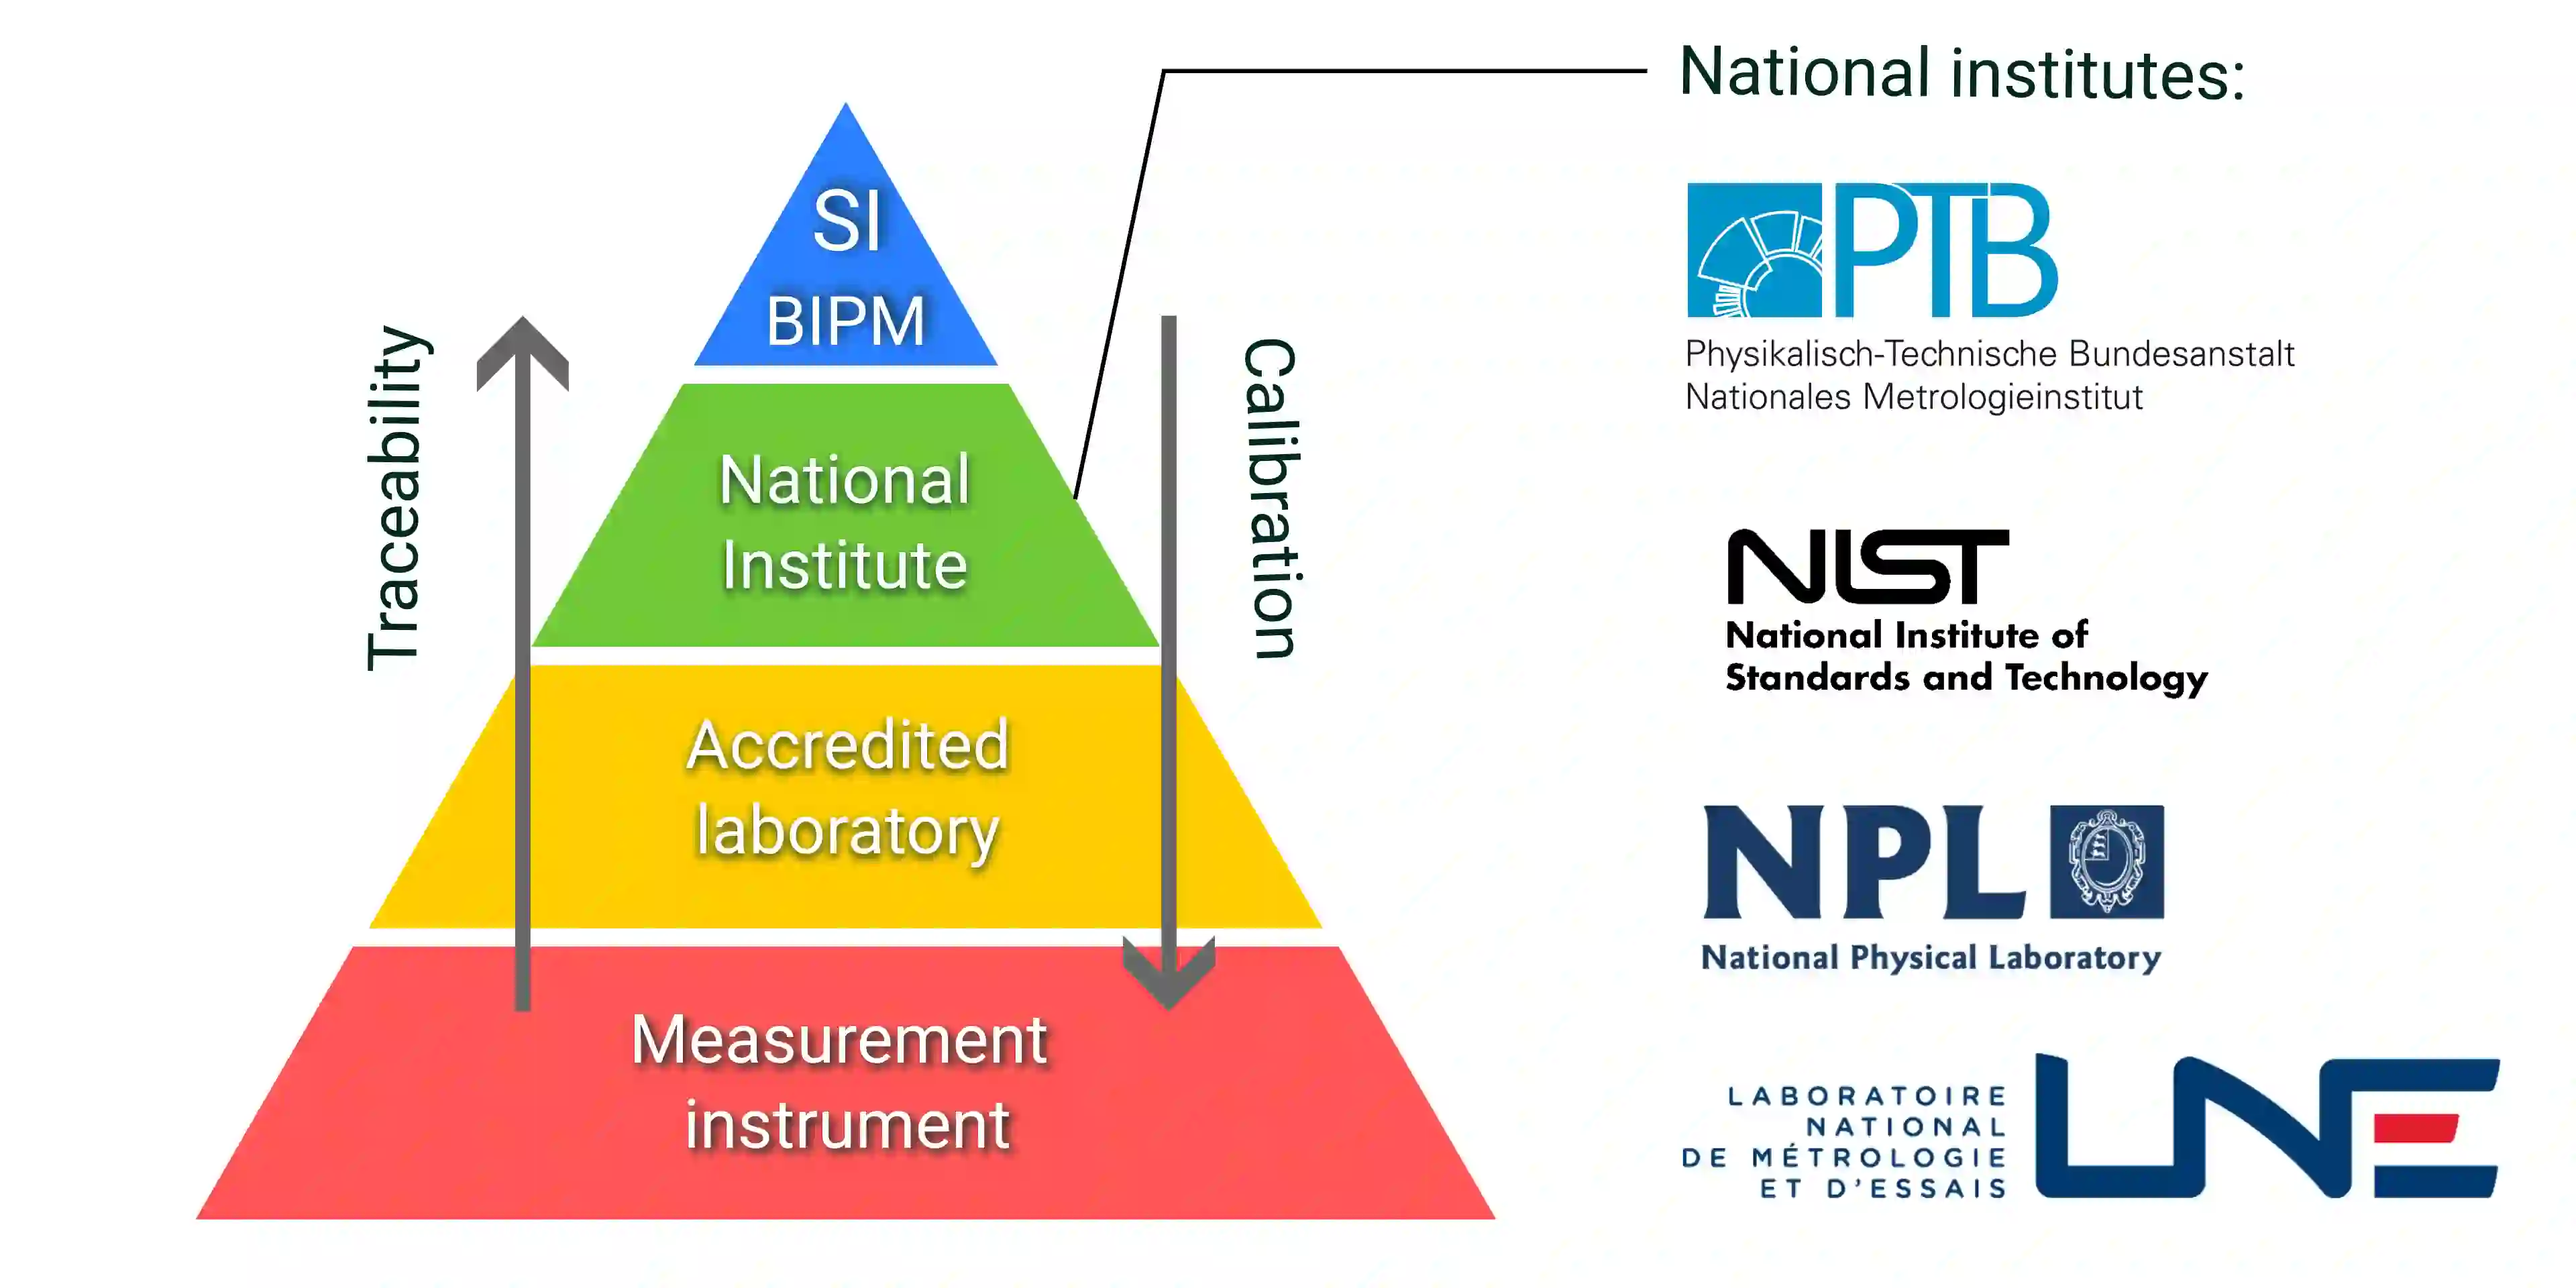
The BIPM is essentially also the main authority when it comes to metrological traceability. The
latter is one of the key concepts of modern metrology and it defines how a measurement result can be
related to a precise reference through a documented unbroken chain of calibrations, where each
contributes to the measurement uncertainty, making this uncertainty knowable.
Traceability is the property of the result of a measurement, not of an instrument or calibration
report or laboratory. Only measurement results can be traceable. Traceability is not achieved
by following any one particular procedure or using particular equipment. Simply by having an
instrument calibrated, even by NIST, is not enough to make the measurement result obtained using that
instrument traceable to realizations of the appropriate SI unit or other specified references. The
measurement system by which values and uncertainties are transferred must be understood clearly and be
under appropriate quality control.
Traceability and calibration pyramid
A traceable measurement result has to follow a specific hierarchy to ensure commonality and
reproducibility of measurements across organizations and countries. The four levels composing the
traceability hierarchy can be defined in a bottom-up manner as follows:
- We have a measuring instrument capable of measuring the requested quantity
- The instrument is calibrated by an accredited laboratory
- The measurement standards and procedures of the accredited laboratory have to be calibrated and
accredited by the according national institute
- BIPM ensures that the national institute procedures and standards are reliable (international
standard)

A key operation enabling traceability is hence calibration, which is the process of adjusting and
verifying the accuracy of a measurement instrument or system by comparing it to a known standard, to
ensure that it provides reliable and accurate measurements.
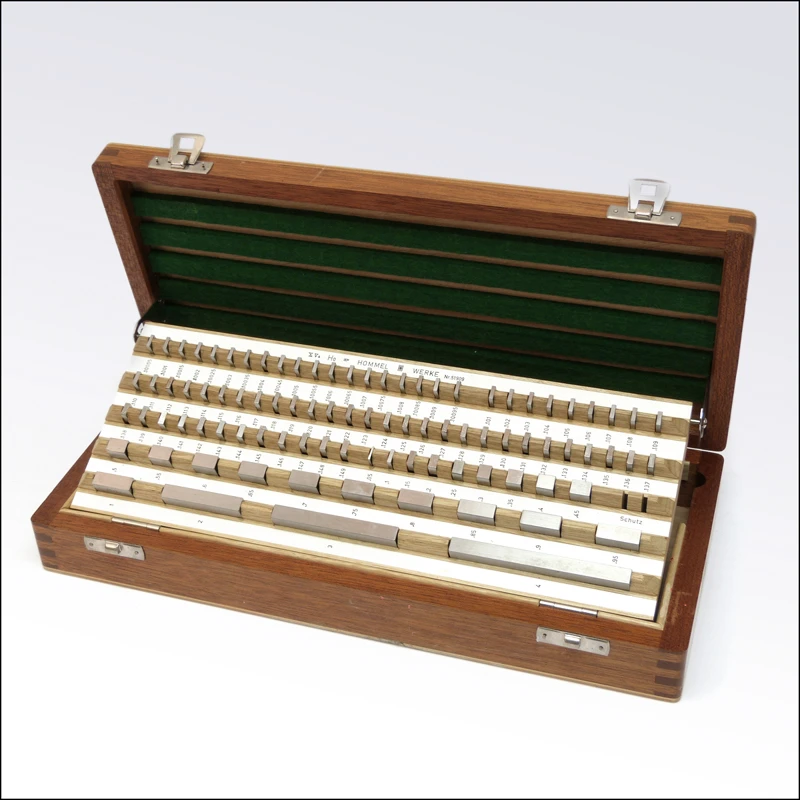
Accredited laboratories often use a combination of primary and working standards. The primary (e.g.,
a gauge block or thermal sensor) is calibrated and certified by a national institute and is in turn
used for calibrating the working standard which is used for actual measurement instrument calibration.

Gauge blocks used for dimensional measurement calibration.
The implementation of calibration procedures and traceability is defined by the ISO/IEC 17025
standard, which is in essence a standard for competence in calibration and testing. To get
accreditation according to this standard, a laboratory must, first and foremost, prove traceability.
The lab must also produce a scope of accreditation, which defines the range of measurements and
calibrations a lab can perform according to the accreditation.
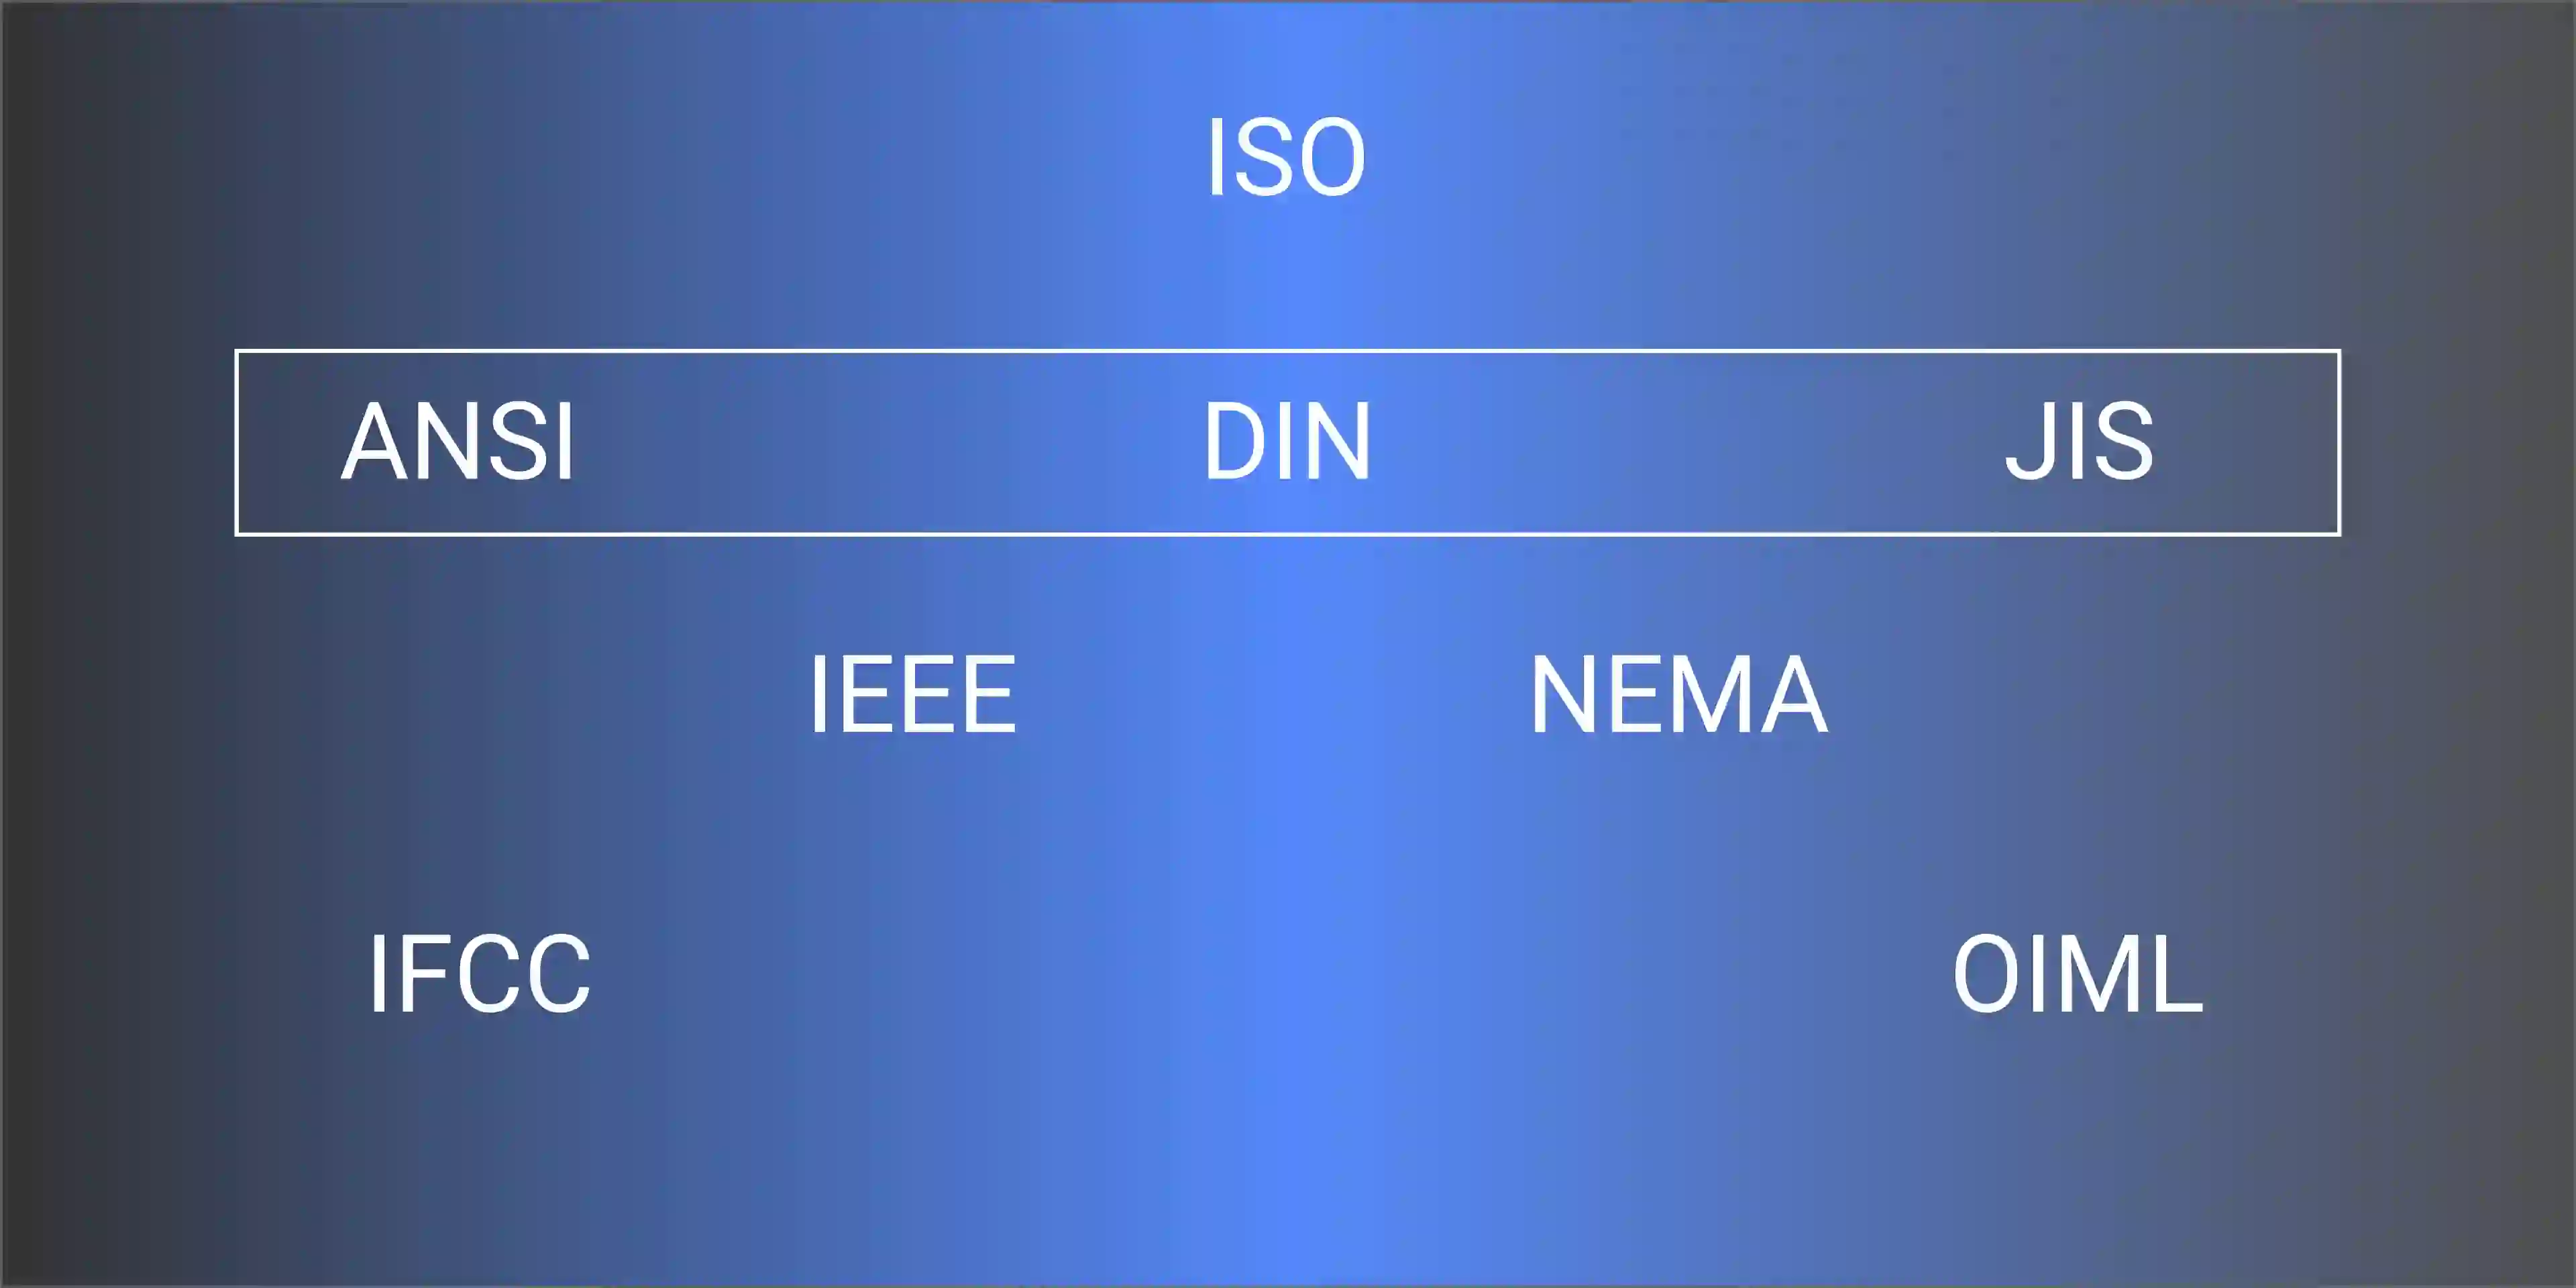
Note: ISO is the International Organization for Standardization, while IEC is International
Electrotechnical Commission. ISO is the overarching standard organization that hold numerous other
affiliated national and international standardization bodies under its wing, as shown below.

What do I need to do to support a claim of traceability?
When someone provides a measurement result, they should be able to explain how they measured it and
how it's connected to a known reference. There are a few things you should find in every valid
measurement:
- A clear description of what they measured, whether it's a quantity or a quality
- Details about the measurement system or working standard they used to make the measurement
- The actual measurement result, including the measured values and associated uncertainty
- Information about the reference they used for comparison
- An internal measurement assurance program for establishing the status of the measurement system or
working standard
- An internal system to check that the reference used is accurate when they compared it to their
measuring tools or working standard
Struggling with measurement traceability?
Our experts can help you establish traceable measurement procedures and ensure your testing meets the required standards.
Request Consultation
View Capabilities
Fundamental terms in metrology
In the next post, we’ll take a look some of the main practical concepts and definitions that are
fundamental in obtaining reliable and traceable measurements in any field of experimentation.

Ready to put metrology principles into practice?
Discover how RD Motion's testing services ensure traceable, reliable measurements for your materials and components.
References
[1] The International System of Units (SI) as
defined by BIPM
[2] Traceability definition
[3] Example of
ISO/IEC 17025:2017 scope of accreditation as obtained by the company Mitutoyo - publicly available
document
[4] NIST/SEMATECH e-Handbook of
Statistical Methods
[5] International
Vocabulary of Metrology
[6] Introduction to Metrology - Israel
Cayetano
Back to blog
Go to next
post
